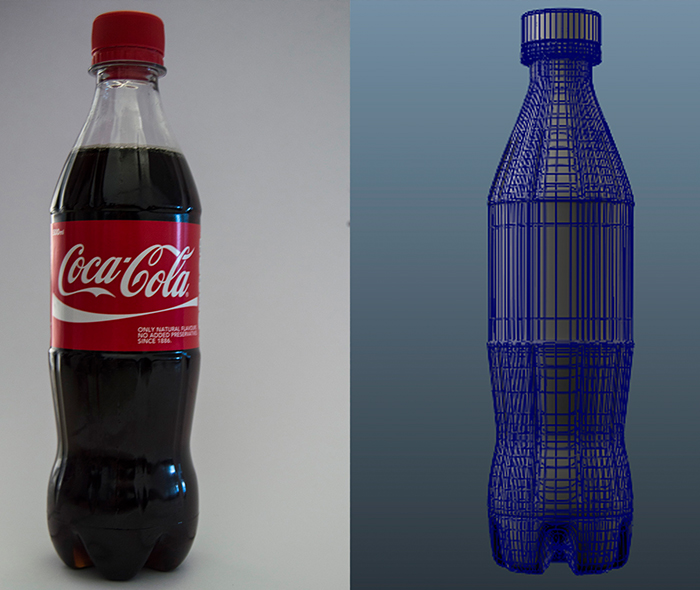
CGI Modelling, Texturing & Lighting
Coke Bottle
April 2015
Throughout my CGI module, I was tasked with developing a 3D model in Maya 2015. This model was taken through three main stages of development; modelling, texturing and lighting. The texture maps were created using Adobe Photoshop CC.
Interesting Parts
- The core structure of this object was created using an outline, which was revolved to generate a polygon surface.
- The plastic texture for the bottle was created with refraction applied, so that elements that are viewed through the bottle will be distorted to give a better sense of depth.
- The majority of the time spent in the texturing phase was spent adjusting the map with a checker board texture applied, to ensure there was no stretching or distortion in any areas of the model.
- The bottle was originally designed with both an outer and an inner layer, so that if the model were to be entirely opaque, there would only ever be outward facing faces, even within the bottle.
What I learned
- As this was the first time I had ever worked in a 3D environment, I learned everything from how to set up a project correctly (using the Maya folder structures) and modelling using polygons, to lighting and rendering a finalised project.
- The biggest learning curve of texturing the model, was learning to control the UV map. I found that zooming in and, at times, adjusting individual UV vertices, can sometimes be faster and more effective than using the in-built mapping methods.
- Through applying refractions to the plastic shaders for the model, I learned a lot about how other maps can effect one another i.e. the bump map was causing the refractions to become distorted.